

My Best GoPro Settings for FPV Drones
[This page contains affiliate links which help support the content and doesn't cost you anything. Thank you for the support!]
Camera settings for FPV can vary depending on the camera because they don’t all offer the same options. I use to fly a GoPro Hero 8 a lot, that I repurposed specifically for FPV as it was going to be at higher risk, but found Hero 8’s to be finicky and unreliable for the fast movements of FPV flying. I recommend using Hero 9’s or newer if possible. I have been flying with the GoPro Hero 11 Mini since its release and at the time of writing this article I believe it to be the best option available even taking into account the “new” DJI air unit. The only thing I really don’t like about the Hero 11 mini is the inability to create and save my own custom settings outside of modifying the built it profiles. The capabilities of the camera however, coupled with the small size and long battery life make it ideal for shooting FPV.
The best setup and settings that I recommend for shooting FPV with GoPro’s works with all cameras from the GoPro Hero 9 on.

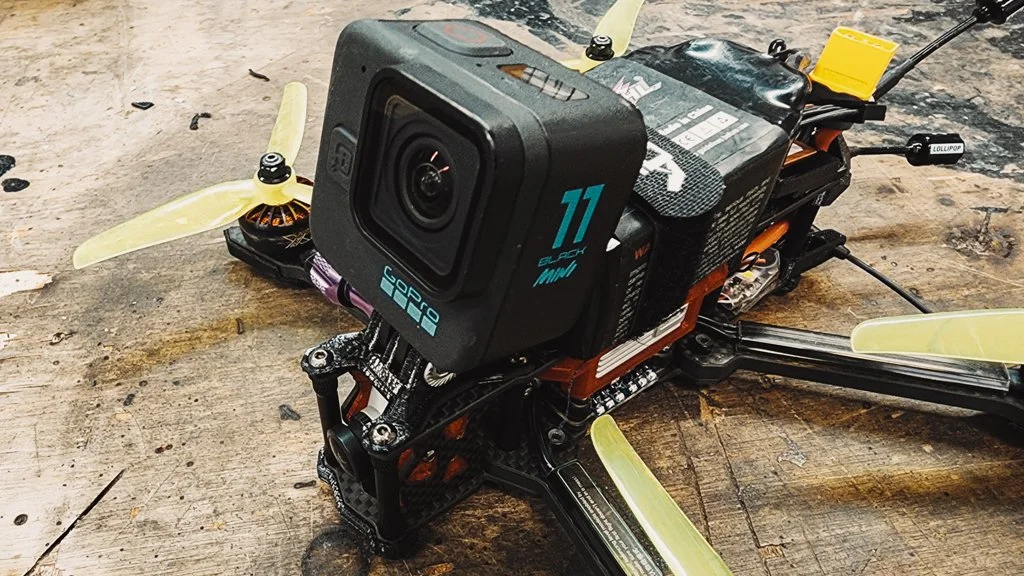
[GoPro Hero 11 Mini action camera mounted to my FPV Drone]
GoPro Mount
I struggle with this a bit because I really prefer 3d printed sleeves that encase my GoPro’s and offer some extra protection. This was my method entirely until I switched to the Hero 11 Mini. Besides the added protection, I could have the cases printed in bright colors which helps in locating a downed drone. The case method also made it fast and easy to remove or place the GoPro which was nice for changing the battery or SD card. The downside was adding a little extra weight, and having to get custom mounts for each quad and each GoPro that I intend to fly. That becomes a bit of an undertaking every time I decide to upgrade GoPro’s.
My current setup after switching to the Hero 11 Mini, is the standard action cam mount on the top of the quads. These are 3d printed, and typically come with an Allen head screw to tighten the camera to the mount which I find extremely annoying. This is done because the standard thumbscrew mount will often impede the props. Smaller thumbscrews are available for action cam mounts and don’t impede the props on most quads, so I added those right away.

Smaller design avoids impeding props on FPV drones. Works with all GoPro models.
ND Filters
ND Filters are great for creating a nice motion blur effect. The best uses in FPV are for shooting a low and fast shot, or possibly a waterfall. As more of a specialized option, you will want to plan those shots specifically for ND Filter use, and remove the filter for the additional shots or flights. When using ND Filters, you want to lock the ISO on your GoPro at 100. For most FPV flying, ND filters are not recommended.

Compatible with GoPro Hero 9, 10, 11, ND4/ND8/ND16/ND32
GoPro FPV Settings
Daytime GoPro FPV Settings
Aspect Ratio - 4k 8:7/60
Lens - Wide
Shutter - Auto
Hypersmooth - OFF
ISO Min - 100
ISO Max - 100-200 (100 For better motion blur, or if using ND filters to prevent introducing extra noise)
Color - Natural
Nighttime or Low Light FPV GoPro Settings
Aspect Ratio - 4k 4:3/30 (This setting has built in noise reduction algorithm!)
Lens - Wide
Shutter - Auto
Hypersmooth - OFF
ISO Min - 100
ISO Max - 800
Color - Natural
Post Production
I find these settings to be the best all around, but there are some things to consider for post flight production
Reelsteady Go - FPV footage shot with these settings and paired with Reelsteady Go yields some impressive results. I find it to be better than Hypersmooth On and no post production stabilization. If you are not using Reelsteady or doing post production stabilization however, then you will want to fly with Hypersmooth On.
Color Grade - I prefer to fly with the native GoPro Color profile and recommend it for most users. Shooting in “Flat” captures more data and allows a lot more flexibility when color editing, but in my opinion is best suited for experienced editors and color graders. If you are a serious professional, plan to be doing some really detailed editing, or maybe just want to future proof some content, then consider switching the Color Setting to “Flat”.
Speed - Shooting in 4K 60 Frames Per Second captures smooth looking footage and allows for some flexibility with speed during the edit. I shoot most of my FPV content in 60 FPS. For shots where you will want dramatic speed ramps, or super slow motion, consider 4K 120 FPS. 120 FPS is a lot of data so I like to keep the flights short and well planned when switching to this frame rate.
Final Thoughts
If you record your FPV Drone flights with GoPro cameras, specifically the Hero 9 or newer, these camera settings should work well for you and help you capture some very nice footage.